Follow Me On Social Media!

Latest Red Velvet Blossom Cookies Recipe – 5 Pro Tips Inside
Make the latest red velvet blossom cookies recipe with this tested recipe. Step-by-step guide with pro tips for amazing results every time!
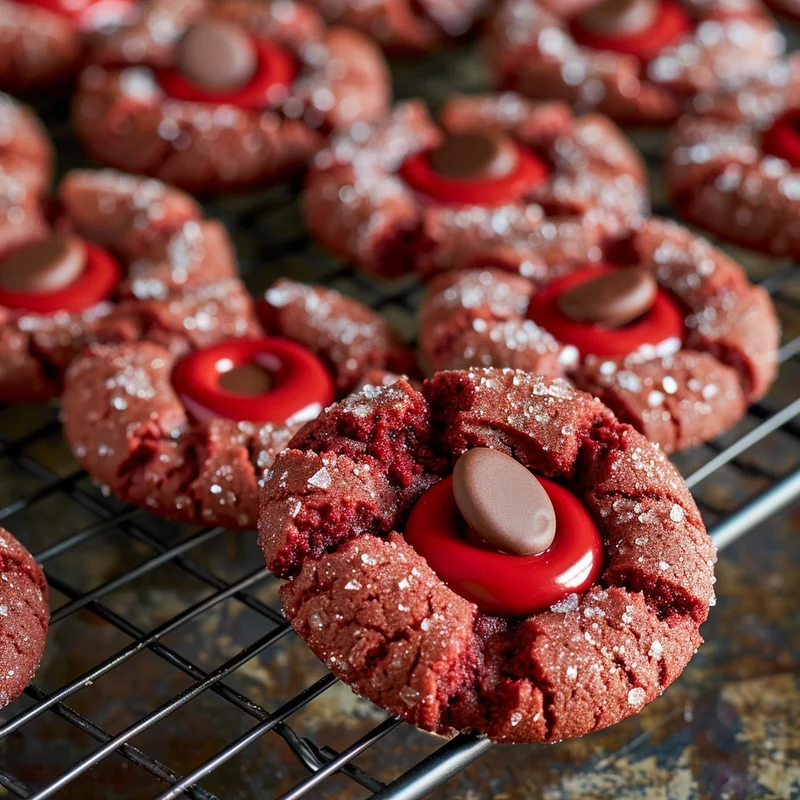
red velvet blossom cookies recipe
📌 Key Takeaways
- ⏱️ Total time: Just 18 minutes (10 min prep + 8 min bake) for 24 stunning cookies
- 🧈 Only 6 ingredients needed – uses convenient red velvet cake mix as the base
- ❄️ Critical step: Chill dough 30 minutes to prevent spreading and achieve perfect texture
- 🍫 Customizable: Works with regular Kisses, Hugs, or any mini chocolate candy
- 🔬 Secret weapon: Optional espresso powder intensifies the red velvet flavor without coffee taste
- 📦 Make-ahead friendly: Freeze dough balls for up to 3 months for fresh-baked cookies anytime
🎯 What Are Red Velvet Blossom Cookies?
These irresistible red velvet blossom cookies are the perfect fusion of the classic peanut butter blossom cookie concept with the beloved flavors of red velvet cake. Each batch yields 24 gorgeous crimson cookies, each crowned with a chocolate Hershey’s Kiss that creates that signature “blossom” appearance. The best part? This easy red velvet blossom cookies recipe requires only 6 simple ingredients and comes together in under 20 minutes.
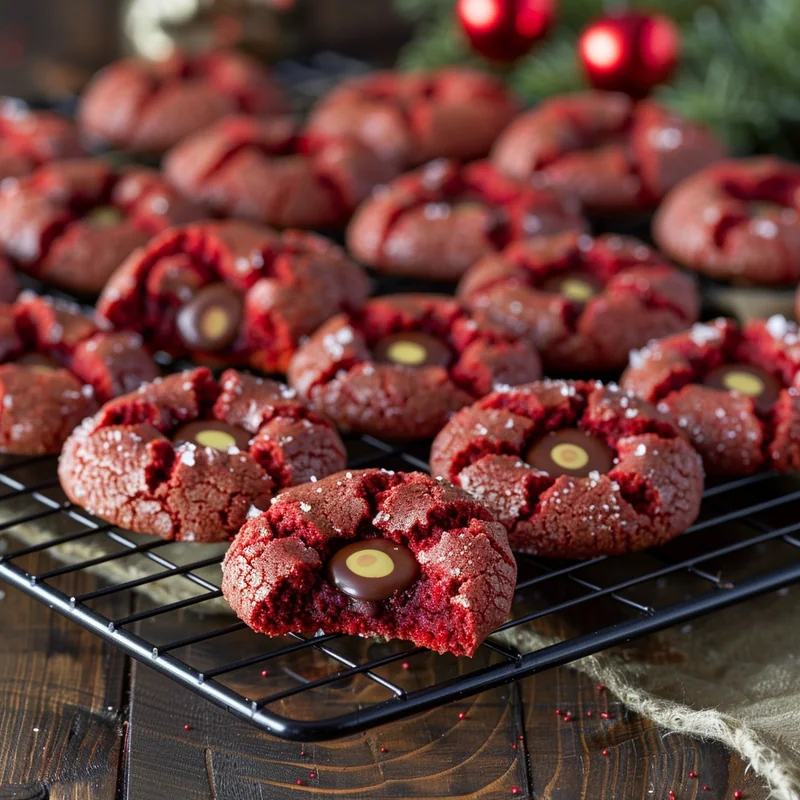
Unlike traditional Hershey’s red velvet blossom cookies that require making dough from scratch, this recipe uses a clever shortcut: red velvet cake mix. This approach guarantees consistent results every time while delivering that authentic red velvet experience – a subtle cocoa flavor with hints of vanilla and that gorgeous deep red color that makes these cookies absolutely showstopping for Valentine’s Day, Christmas, or any special occasion.
The origin of “blossom cookies” traces back to the 1950s when home bakers began pressing Hershey’s Kisses into peanut butter cookie dough. The technique creates cookies that resemble flowers in bloom, with the chocolate kiss acting as the center. This red velvet variation takes that beloved concept and transforms it into something even more special – a cookie that’s both visually stunning and incredibly delicious.
Why This Recipe Works
What makes this the best red velvet blossom cookies recipe you’ll find? Several factors work together:
- Cake mix base provides perfect texture and foolproof flavor
- Melted butter creates a chewy, fudgy interior
- Sugar coating adds sparkle and subtle crunch
- Proper chilling ensures cookies hold their shape
- Optional espresso powder deepens the chocolate notes without adding coffee flavor
🔬 The Science Behind Perfect Blossom Cookies
Understanding the science behind cookie baking transforms you from a recipe follower into a confident baker who can troubleshoot any issue. Let’s explore why each technique in this recipe matters.
The Maillard Reaction: Why 350°F Is the Sweet Spot
The Maillard reaction – that magical browning process that creates complex flavors – begins around 280°F and accelerates significantly above 300°F. Baking these red velvet cookies at 350°F represents the perfect balance:
- Too low (325°F): Cookies spread too much before setting, resulting in flat, pale cookies with less flavor development
- Just right (350°F): Edges set quickly while centers stay soft, creating that ideal chewy texture with beautiful crinkles
- Too high (375°F): Outer edges over-brown before centers cook through, potentially burning the delicate red color
Fat Temperature Effect on Cookie Spread
This recipe calls for melted butter rather than softened butter, and here’s why it matters for blossom cookies. When butter is melted, it incorporates into the dough differently than creamed butter. The result is:
- A denser, fudgier texture perfect for supporting the weight of a chocolate kiss
- Less air incorporation, which means cookies puff up rather than spread out
- A chewier final product that stays soft for days
However, melted butter also means the dough needs chilling. Without cold rest time, the fat would be too warm, causing excessive spread in the oven.
Why Cookie Dough Cold Resting Matters
The 30-minute chill time isn’t optional – it’s essential for several reasons:
- Fat solidification: Cold butter takes longer to melt in the oven, giving the cookie structure time to set before spreading
- Gluten relaxation: Mixing develops some gluten; resting allows it to relax, preventing tough cookies
- Flavor development: Even a short rest allows flavors to meld and intensify
- Workability: Cold dough is much easier to roll into uniform balls
For even better results, consider the freezer dough ball method (a best-kept secret among professional bakers): roll your dough balls, freeze them on a sheet pan, then bake directly from frozen. Add 1-2 minutes to bake time. This technique produces the tallest, chewiest cookies possible.
Sugar Ratio: The Chewy vs. Crispy Science
The cake mix in this recipe already contains a balanced sugar ratio optimized for chewy results. Rolling the dough balls in additional sugar serves multiple purposes:
- Creates a sparkly appearance that catches light beautifully
- Forms a thin crispy shell that contrasts with the chewy interior
- Helps create the signature crinkle pattern as the cookie expands
Using coarse sugar instead of regular granulated sugar creates even more visual impact, as the larger crystals don’t dissolve completely during baking.
Understanding Red Velvet Flavor
Authentic red velvet flavor comes from a specific combination: cocoa + vanilla + tang + color. Traditional recipes achieve this with buttermilk and vinegar, but cake mix accomplishes the same thing through carefully balanced ingredients. The optional espresso powder in this recipe enhances the cocoa notes without adding any perceptible coffee flavor – it simply makes the chocolate taste more “chocolatey.”
📝 Ingredients for Red Velvet Blossom Cookies
One of the best things about this kiss cookies recipe is the short ingredient list. Here’s everything you need, plus helpful notes on each component:
| Ingredient | Amount | Purpose |
|---|---|---|
| Red velvet cake mix | 1 box (15.25 oz) | Base flavor, color, and structure |
| Large eggs | 2 | Binding, moisture, structure |
| Unsalted butter, melted | ½ cup (1 stick) | Richness, chewy texture |
| Vanilla extract | 1 tsp | Flavor enhancement |
| Espresso powder (optional) | ½ tsp | Deepens chocolate flavor |
| Sugar (regular or coarse) | 1 cup | Coating for sparkle and crunch |
| Hershey’s Kiss candies | 24 | The signature “blossom” topper |
Ingredient Notes & Substitutions
Red Velvet Cake Mix
Any brand works well – Betty Crocker, Duncan Hines, and Pillsbury all produce excellent results. The cake mix provides the cocoa, color, leavening, and balanced dry ingredients. Make sure to use a standard 15.25 oz box; larger “family size” boxes will require recipe adjustments.
Butter vs. Oil
While some cake mix cookie recipes call for oil, butter is essential for blossom cookies. It provides:
- Better flavor than neutral oil
- Firmer texture that supports the chocolate kiss
- A dough that holds its shape during baking
Egg Considerations
Use room temperature eggs for best incorporation. For egg-free versions, try 2 flax eggs (2 tbsp ground flax + 6 tbsp water, rested 5 minutes) – note that texture will be slightly different but still delicious.
Chocolate Kiss Varieties
The classic choice is milk chocolate Hershey’s Kisses, but you can customize with:
- Hershey’s Hugs: Creates a beautiful white and brown striped center (note: they melt more; refrigerate to set)
- Dark chocolate Kisses: More intense chocolate flavor
- White chocolate Kisses (Cookies ‘n’ Creme): Stunning visual contrast
- Cherry cordial Kisses: Perfect for Valentine’s Day
- Candy cane Kisses: Ideal for Christmas cookies
If you love experimenting with cookie recipes, you might also enjoy our Special Chocolate Chip Cookies Recipe – Made in 20 Minutes which uses similar quick techniques for amazing results.
👨🍳 Step-by-Step Instructions
Step 1: Mix the Wet Ingredients
In a large mixing bowl, whisk together the 2 eggs, ½ cup melted butter, and 1 teaspoon vanilla extract until fully combined and slightly frothy. The mixture should be smooth with no visible egg streaks.
💡 Pro Tip: Make sure your melted butter has cooled slightly (about 5 minutes after melting) before adding to eggs. Hot butter can partially cook the eggs, creating an unpleasant texture.
Step 2: Add the Dry Ingredients
Add the entire box of red velvet cake mix to the wet ingredients. If using espresso powder, add it now. Using a sturdy spatula or wooden spoon, stir until the mixture is fully incorporated and no dry pockets remain.
The dough will be thick and slightly sticky – this is exactly what you want. Resist the urge to add more flour; the cake mix has the perfect ratio already.
💡 Pro Tip: Don’t overmix! Excessive stirring develops too much gluten, resulting in tough cookies. Mix just until combined – about 30-40 strokes with a spatula.
Step 3: Chill the Dough
Cover the bowl with plastic wrap and refrigerate for at least 30 minutes. The dough should be firm enough to roll into balls without sticking excessively to your hands.
If you’re short on time, you can place the dough in the freezer for 15 minutes instead. For even better results, chill for up to 2 hours – the cookies will spread less and have a more pronounced crinkle pattern.
💡 Pro Tip: Use this chilling time to unwrap all your Hershey’s Kisses! Removing wrappers from 24 kisses takes longer than you’d think, and you’ll need them ready the moment cookies come out of the oven.
Step 4: Prepare for Baking
While the dough chills, preheat your oven to 350°F (175°C). Line two baking sheets with parchment paper or silicone baking mats. Place the 1 cup of sugar in a shallow bowl for coating.
Step 5: Shape and Coat the Dough
Remove the chilled dough from the refrigerator. Using a cookie scoop or your hands, form the dough into 1½-inch balls (about 1 tablespoon each). Roll each ball in the sugar to coat completely.
Place the coated dough balls on prepared baking sheets, spacing them about 2 inches apart to allow for slight spreading. You should fit 12 cookies per standard sheet pan.
💡 Pro Tip: For perfectly uniform cookies, use a kitchen scale. Each dough ball should weigh approximately 25 grams. Consistent size ensures even baking across the entire batch.
Step 6: Bake to Perfection
Bake for 8-10 minutes, until the edges just start to set and the cookies are puffed and barely beginning to crinkle. The centers will look slightly underdone – this is correct! They’ll continue cooking on the hot sheet.
| Dough Ball Size | Weight | Bake Time at 350°F |
|---|---|---|
| Small (1 inch) | 20g | 7-8 minutes |
| Standard (1.5 inch) | 25g | 8-10 minutes |
| Large (2 inch) | 30g | 10-12 minutes |
💡 Pro Tip: For even browning, rotate the pan 180 degrees halfway through baking. This compensates for hot spots that most home ovens have.
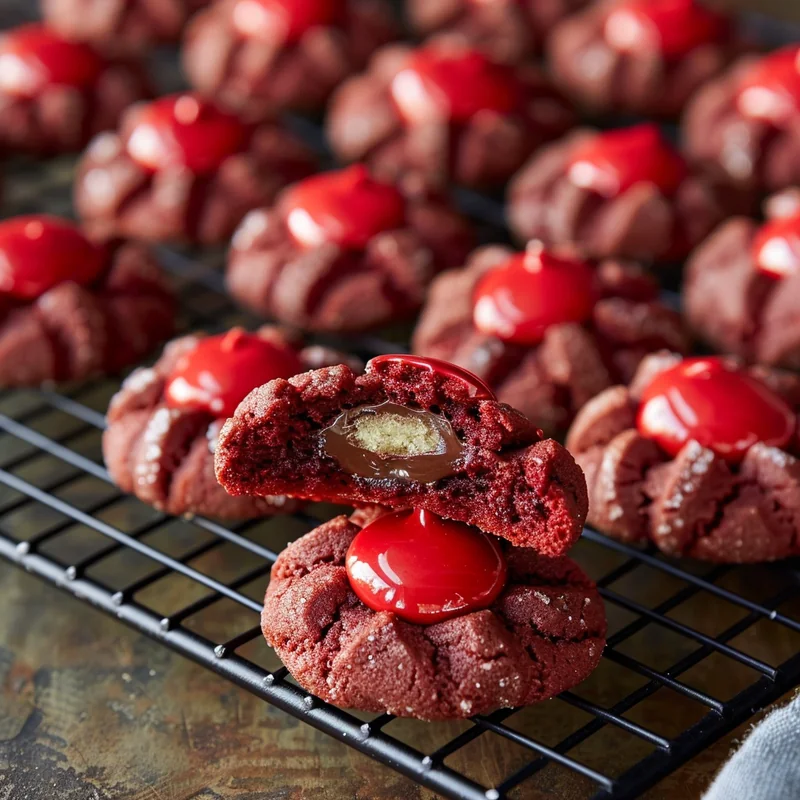
Step 7: Add the Chocolate Kisses
This step is time-sensitive! Remove the cookies from the oven and immediately (within 30 seconds) gently press an unwrapped Hershey’s Kiss into the center of each cookie. Press firmly enough that the kiss anchors into the soft cookie but not so hard that you flatten the cookie.
The residual heat will slightly soften the bottom of the kiss, helping it adhere to the cookie as everything cools.
⚠️ Important: If using Hershey’s Hugs or other candies with white chocolate, they will melt more than regular kisses. Transfer the entire baking sheet to the refrigerator or freezer for 10-15 minutes immediately after adding the candy to help them set without melting into the cookie.
Step 8: Cool Completely
Allow the cookies to cool on the baking sheet for 5 minutes, then transfer to a wire cooling rack. Let them cool completely (about 20-30 minutes) before handling or stacking.
The chocolate kisses need time to firm up. Regular milk chocolate kisses will set at room temperature within 30 minutes. Touching them too soon will result in fingerprint marks or the kiss pulling away from the cookie.
Red Velvet Blossom Cookies Recipe
- Total Time: 50 minutesutes
- Yield: 24 1x
Description
These irresistible red velvet blossom cookies are a perfect simple treat that comes together so easily. Only 6 ingredients, about 10 minutes to prep and so easy to vary by pressing any of your favorite Hershey kiss variety, or another favorite chocolate into the center.
Ingredients
Scale
1 box red velvet cake mix, 15.25 oz.
2 large eggs
½ cup unsalted butter, melted
1 tsp vanilla extract
½ tsp espresso powder (optional!)
1 cup regular or coarse sugar
24 Hershey’s kiss candies, or other mini chocolate candy
Instructions
Whisk together eggs, melted butter, and vanilla extract until combined. Add the red velvet cake mix and espresso powder (if using) and stir until fully incorporated.
When dough can easily be rolled into balls, form into 1½ inch balls and roll in sugar to coat.
Bake in oven preheated to 350°F for about 8-10 minutes, until edges start to set and the cookies are puffed and barely starting to crinkle.
Remove from oven and gently press a chocolate candy kiss into the center of each, allowing to cool completely before eating.
If using a Hugs candy kiss, the candy will not fully hold shape, but rather melt into the cookie slightly. If you leave transfer them to the fridge or freezer until set that will keep them from melting into the cookie. The regular chocolate kisses set ok if not touched until set.
Notes
Storage: Store in an airtight container at room temperature for up to 5 days, or freeze for up to 3 months.
Make Ahead: You can prepare the dough/batter up to 24 hours in advance and refrigerate until ready to bake.
Substitution: For a dairy-free version, use coconut oil or vegan butter in place of regular butter.
Important: Let cool completely before cutting for clean, perfect squares or pieces.
- Prep Time: 10 minutesutes
- Cook Time: 8 minutesutes
- Category: Desserts, Cookies, Christmas Cookies, Valentine's Day
- Method: Dessert
- Cuisine: American
⚡ Pro Tips & Common Mistakes to Avoid
Key Tips for Success
- Room temperature eggs: Cold eggs don’t incorporate as smoothly into melted butter
- Don’t skip chilling: Warm dough spreads too much, creating flat cookies that can’t support a kiss
- Unwrap kisses in advance: You need to work quickly once cookies come out of the oven
- Use parchment paper: Ensures easy release and even browning on the bottom
- Watch for visual cues: Cookies should be puffed with just-set edges; centers will look soft
Common Mistakes & How to Fix Them
Problem: Cookies spread too flat
Cause: Dough wasn’t chilled enough, or oven temperature was too low
Solution: Chill dough longer (up to 2 hours) and verify oven temperature with an oven thermometer. Most home ovens run 25-50°F off from the displayed temperature.
Problem: Chocolate kiss slides off or won’t stick
Cause: Cookies cooled too much before adding kisses, or kisses were added too soon (cookie still puffy)
Solution: Add kisses within 30 seconds of removing from oven, but wait until cookies have deflated slightly from their maximum puff.
Problem: Cookies are too cakey/puffy
Cause: Overmeasured cake mix or used extra-large eggs
Solution: Measure cake mix by weight (432g for a 15.25 oz box) and use standard large eggs only.
Problem: Cookies don’t have crinkle pattern
Cause: Dough was too warm, or sugar coating was too thin
Solution: Ensure dough is properly chilled and roll generously in sugar – the sugar coating is what creates the signature crackle appearance.
Problem: Red color faded after baking
Cause: Overbaking or oven too hot
Solution: Reduce bake time by 1-2 minutes and double-check oven temperature. Red dyes can fade with extended heat exposure.
Altitude Adjustments
If you’re baking at high altitude (above 3,500 feet), make these modifications:
- Increase oven temperature by 15-25°F
- Reduce bake time by 1-2 minutes
- Add 1-2 tablespoons extra flour to the dough
- The lower air pressure at altitude causes cookies to spread more, so extra chilling is especially important
Humidity Considerations
High humidity affects cookie baking in several ways:
- Dough may feel stickier – chill longer or add 1 tablespoon flour
- Sugar coating may clump – keep sugar in a sealed container until ready to use
- Cooled cookies may become soft faster – store in airtight container with a silica gel packet
🔧 Equipment Needed
You don’t need fancy equipment to make perfect red velvet blossom cookies, but having the right tools makes the process easier:
Essential Equipment
- Large mixing bowl: At least 3-quart capacity
- Whisk: For combining wet ingredients
- Sturdy spatula or wooden spoon: For mixing in cake mix
- Baking sheets: Two standard half-sheet pans (18×13 inches)
- Parchment paper or silicone baking mats: Prevents sticking
- Shallow bowl: For the sugar coating
- Cooling rack: Essential for proper cooling and preventing soggy bottoms
Helpful (But Optional)
- Cookie scoop (1 tablespoon size): Creates perfectly uniform cookies
- Kitchen scale: For precise measurements and consistent results
- Oven thermometer: Verify your oven’s actual temperature
- Timer: Don’t rely on guessing – these cookies can go from perfect to overdone quickly
For more insights on proper baking techniques and equipment, the experts at King Arthur Baking offer excellent resources for bakers of all skill levels.
🔄 Variations & Flavor Ideas
Once you’ve mastered the basic red velvet blossom cookies recipe, try these creative variations:
| Variation | Modification | Best For |
|---|---|---|
| Peppermint Red Velvet | Replace vanilla with ½ tsp peppermint extract; use candy cane kisses | Christmas cookies |
| Cream Cheese Filled | Press a small frozen cream cheese ball into center before kiss | Special occasions |
| Orange Red Velvet | Add 1 tsp orange zest + ¼ tsp orange extract | Unique flavor twist |
| Double Chocolate | Use dark chocolate kisses; increase espresso to 1 tsp | Chocolate lovers |
| White Chocolate Dream | Roll in powdered sugar instead; top with white chocolate kiss | Elegant presentation |
| Caramel Stuffed | Use Hershey’s Kisses with caramel filling | Extra indulgence |
Sugar-Roll vs. Powdered-Sugar Crinkle Style
There are two main approaches to coating blossom cookies, each creating a different final look:
Traditional Sugar-Roll (This Recipe)
- Creates sparkly, slightly crunchy exterior
- Sugar caramelizes slightly during baking
- More pronounced crinkle pattern
- Classic blossom cookie appearance
Powdered-Sugar Crinkle Style
- Creates dramatic white crackle pattern against red
- Softer exterior texture
- More visual contrast
- Similar to red velvet crinkle cookies
To try the crinkle style: Roll dough balls first in granulated sugar, then in powdered sugar just before baking. The double coating creates the most dramatic crackle effect.
Dietary Adaptations
Gluten-Free Version
Use a gluten-free red velvet cake mix (Betty Crocker makes one). The recipe works identically – just ensure all other ingredients are certified gluten-free.
Dairy-Free Version
Replace butter with dairy-free butter alternative (like Earth Balance). Use dairy-free chocolate kisses or alternative chocolate drops. Results will be slightly less rich but still delicious.
Egg-Free Version
Replace 2 eggs with one of these options:
- 2 flax eggs (2 tbsp ground flaxseed + 6 tbsp water, rested 5 minutes)
- ⅓ cup unsweetened applesauce + ½ tsp baking powder
- Commercial egg replacer following package directions
If you enjoy cookies without peanut butter (great for those with allergies), this recipe proves you can make amazing Hershey kiss cookies without peanut butter that everyone can enjoy!
📦 Storage & Make-Ahead Guide
These red velvet blossom cookies are perfect for advance preparation, making them ideal for holidays, parties, and gift-giving.
Storing Baked Cookies
| Method | Duration | Tips |
|---|---|---|
| Room Temperature | 5-7 days | Airtight container; separate layers with parchment |
| Refrigerator | 2 weeks | Let come to room temp before serving for best texture |
| Freezer | 3 months | Thaw at room temperature 1-2 hours before serving |
The Freezer Dough Ball Method (Best Kept Secret!)
This is the ultimate make-ahead strategy for always having fresh-baked cookies ready:
- Prepare dough and roll into balls as directed
- Roll each ball in sugar and place on a parchment-lined sheet pan
- Freeze for 2 hours until solid
- Transfer frozen dough balls to a freezer bag or container
- Label with date and baking instructions
- Freeze for up to 3 months
Baking from Frozen
| Dough Ball Size | Temperature | Bake Time from Frozen |
|---|---|---|
| Small (20g) | 350°F | 9-10 minutes |
| Standard (25g) | 350°F | 10-12 minutes |
| Large (30g) | 350°F | 12-14 minutes |
Place frozen dough balls directly on prepared baking sheet – no thawing needed! Add 1-2 minutes to standard bake time and watch for the same visual cues (puffed, just-set edges).
Scaling for Events
| Event Size | Cookies Needed | Recipe Batches | Kisses Needed |
|---|---|---|---|
| Small gathering (10) | 24 cookies | 1 batch | 1 bag (24 count) |
| Medium party (25) | 48 cookies | 2 batches | 2 bags |
| Large event (50) | 96 cookies | 4 batches | 4 bags |
| Cookie exchange | 72 cookies | 3 batches | 3 bags |
Gift Packaging Tips
Red velvet blossom cookies make stunning edible gifts:
- Wait until chocolate kisses are fully set (at least 2 hours at room temperature)
- Use cellophane bags tied with ribbon for individual servings
- Layer in decorative tins with parchment between layers
- Include a small card with storage instructions
- For shipping, wrap individual cookies and add cushioning material
❓ Frequently Asked Questions
Can I make red velvet blossom cookies without cake mix?
Yes, though it requires more ingredients and effort. You’ll need to combine 2¼ cups flour, 3 tablespoons cocoa powder, 1 cup sugar, 1½ teaspoons baking powder, ½ teaspoon salt, red gel food coloring, butter, eggs, and vanilla. The cake mix method is preferred because it guarantees consistent results with the perfect red velvet flavor profile already balanced.
Why did my Hershey’s Kisses melt completely into the cookies?
This happens when cookies are overbaked or the kitchen is very warm. To prevent this: bake for the minimum time (8 minutes), add kisses immediately when cookies come out, and transfer the entire baking sheet to the refrigerator for 15 minutes if needed. Regular milk chocolate kisses are more stable than Hugs or specialty varieties.
How do I keep the red color vibrant?
The red color can fade with excessive heat. To maintain vibrancy: don’t overbake (8-10 minutes maximum), verify your oven temperature is accurate, and store cookies away from direct light. The cake mix contains color-stable dyes, but prolonged baking or high temperatures will still cause some fading.
Can I use other chocolates instead of Hershey’s Kisses?
Absolutely! Any small chocolate candy works well. Try Rolos for a caramel center, Rolo-shaped Lindor truffles for extra decadence, or chocolate-covered cherries for a sophisticated twist. Even mini peanut butter cups work beautifully (making this similar to our Peanut Butter M&M Cookies). Just ensure the candy is small enough to fit proportionally on the cookie.
How far in advance can I make these cookies?
Baked cookies stay fresh for 5-7 days at room temperature or up to 3 months frozen. For best results with make-ahead baking, freeze the unbaked dough balls instead of finished cookies – this way you can have warm, fresh-baked cookies in just 12 minutes whenever you want them.
My cookies came out flat. What went wrong?
Flat cookies usually result from one of these issues: dough wasn’t chilled long enough, butter was too warm when mixed, oven temperature was too low, or baking sheets were still warm from a previous batch. Always chill dough at least 30 minutes, use cool baking sheets, and verify oven temperature with a thermometer.
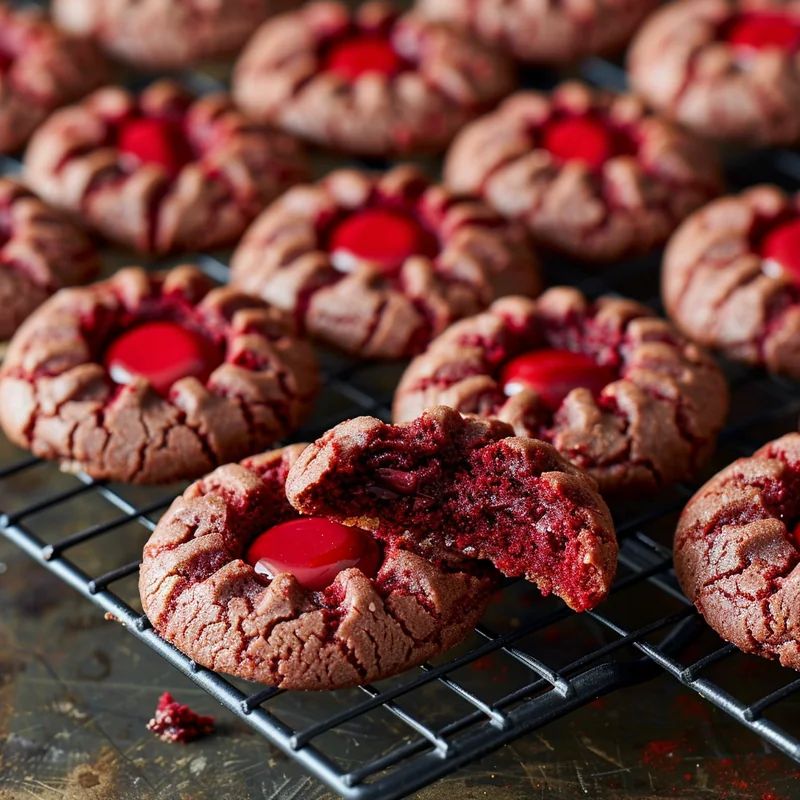
Are these cookies chewy or crunchy?
When baked correctly, these cookies have the best of both worlds: a slightly crispy sugar-coated exterior with a soft, chewy, almost fudgy interior. The key is not overbaking – remove from oven when centers still look slightly underdone. They’ll firm up as they cool.
📚 Learn More About Baking
Want to deepen your baking knowledge? These trusted resources offer excellent guidance:
- King Arthur Baking Learn Center – Comprehensive guides on baking techniques, troubleshooting, and ingredient science
- Serious Eats Desserts – In-depth recipes with scientific explanations for why techniques work

👩🍳 About the Author
Chef Lucía Barrenechea Vidal
Chef Lucía brings over 15 years of professional pastry experience to every recipe she develops. Trained in classical French techniques with a passion for American comfort baking, she specializes in creating foolproof recipes that deliver professional results in home kitchens. Her philosophy: great baking is part science, part soul, and always made with love.
When she’s not developing recipes for Frutameal, Chef Lucía teaches baking workshops and experiments with fusion desserts that combine her Latin American heritage with global flavors.