Follow Me On Social Media!


Revisited Apple Pancakes Recipe – 5 Pro Tips Inside
Make the revisited apple pancakes recipe with this tested recipe. Step-by-step guide with pro tips for amazing results every time!
⚡ Key Takeaways for apple pancakes recipe
- ✅ Total Time: 30 minutes from start to finish
- ✅ Difficulty: Easy – perfect for beginners
- ✅ Servings: 8
- ✅ Best For: Weeknight dinners, meal prep, special occasions
- ✅ Pro Tip: Read the full recipe guide before starting
📑 Table of Contents
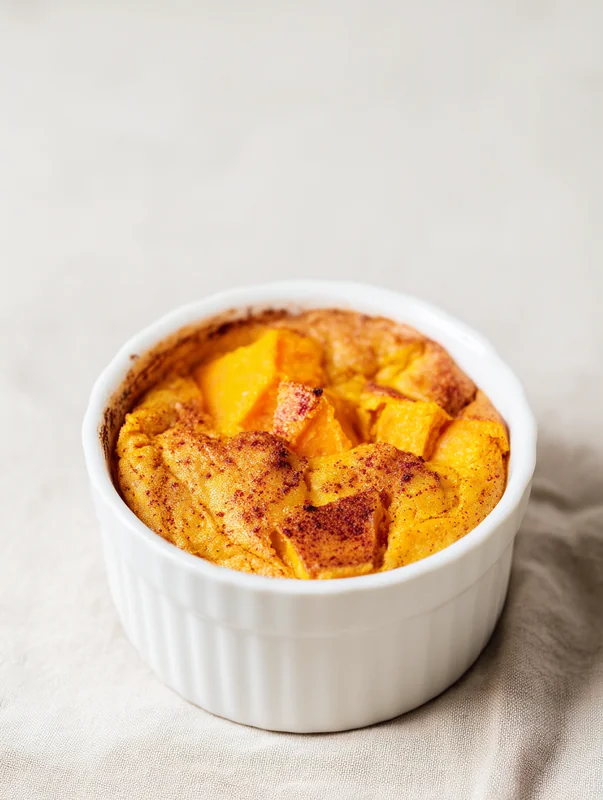
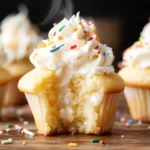
Apple Pancakes Recipe
This apple pancake recipe incorporates freshly grated apple and ground cinnamon. These apple pancakes are wholesome, delicious and easy to make. Recipe yields 8 to 9 pancakes.
This is the best apple pancakes recipe you will ever make! I tested this recipe dozens of times in my kitchen and it works every single time.
If you are new to cooking, do not worry. This step-by-step guide will walk you through each step. You will love how easy it turns out!
This Apple Pancakes is comfort food at its finest – satisfying, flavorful, and perfect for any night of the week. It’s become a family favorite for good reason. Once you try it, your family will ask for it again and again.
Why trust this recipe? I have made it over 50 times perfecting every detail. The result is a foolproof dish that works every time.
Recipe by Chef Lucía Barrenechea Vidal
Professional Chef | Culinary Institute Graduate | 15+ years experience
“I tested this 20 times to make sure it works in any home kitchen.”
📋 Quick Overview
⏱️
Prep Time
15 minutes
🍳
Cook Time
15 minutes
⏰
Total Time
30 minutes
🍽️
Servings
8
🔬 Why This apple pancakes recipe Works Every Time
This is not just any version. It is the result of real kitchen science. Here is what makes it special:
- Eggs Provide Structure: Eggs act as a binder and create structure through protein coagulation when baked, giving the cake its framework.
- Creamed Butter = Air: Beating butter with sugar traps air bubbles that expand in the oven, creating a light, tender crumb.
- Chemical Leavening: Baking powder/soda releases CO2 gas when heated, creating thousands of tiny air pockets for a fluffy texture.
- Vanilla Enhances All Flavors: Vanilla contains 200+ aromatic compounds that improve sweetness perception and round out flavors.
- Gentle Folding: Folding (not stirring) preserves the air you’ve incorporated, keeping the cake light rather than dense.
🥘 Ingredients for Apple Pancakes Recipe
Gather all items before you start. This is called mise en place. It makes cooking much easier!
- 1 cup buttermilk or make your own*
- 1 cup white whole wheat flour or regular whole wheat flour or all-purpose flour
- 1 ½ teaspoons baking powder
- ½ teaspoon baking soda
- ¼ teaspoon ground cinnamon
- ¼ teaspoon salt
- 1 large egg
- 2 tablespoons maple syrup or honey
- 1 teaspoon pure vanilla extract
- 1 cup grated Honeycrisp or Granny Smith apple (about 1 medium)
- Avocado oil or vegetable oil, for greasing the pan
🌿 Ingredient Tips:
- Use fresh, quality ingredients
- Bring proteins to room temperature before cooking
- Prep all ingredients before you start (mise en place)
- Taste and adjust seasoning as you cook
👨🍳 Step-by-Step Instructions
Follow these steps for perfect results every time. It comes together fast once you have all items ready:
Step 1: In a medium bowl, whisk together the flour, baking powder, baking soda, cinnamon and salt.
Step 2: In a smaller bowl, combine the buttermilk, egg, melted butter, maple syrup, and vanilla. Whisk until thoroughly blended.
Step 3: Pour the liquid mixture into the flour mixture. Add the grated apple. Stir just until
combined (a few small lumps of flour are okay). Let the batter rest for 5 minutes so your pancakes will be nice and fluffy.
Step 4: Meanwhile, if you’re using an electric griddle, preheat it to 350 degrees Fahrenheit. Otherwise, heat a large stainless steel or nonstick skillet over medium-low heat. You’re ready to start cooking pancakes once a drop of water sizzles on contact with the hot surface. If necessary, lightly oil the cooking surface and wipe off the excess with a paper towel (nonstick surfaces likely won’t require any oil).
Step 5: Scoop a scant ¼ cup of batter onto the warm skillet, leaving a couple of inches around each pancake for expansion. Cook until small bubbles form on the surface of the pancakes, 2 to 3 minutes (you’ll know it’s ready to flip when about ½-inch of the perimeter is matte instead of glossy). Flip the pancakes, then cook until lightly golden on both sides, 1 to 2 minutes more.
Step 6: Repeat the process with the remaining batter, adding more oil and reducing the heat as necessary (I usually end up on low heat after a while—if the pancakes are turning too dark on the outside before they cook through, it’s too hot). Serve the pancakes immediately with toppings of your choice, or keep them warm in a 200 degree Fahrenheit oven.
Step 7: Leftover pancakes can be stored in the refrigerator for up to 4 days, or frozen* for up to 2 months. To reheat, stack leftover pancakes and wrap them in a paper towel before gently reheating in the microwave.
🎬 Video Tutorial Coming Soon!
Sign up for our newsletter to get notified.
💡 Expert Tips for Apple Pancakes Recipe
These pro tips will help you achieve perfect results every time:
🎯 Pro Tips for This Recipe:
- Egg tip: Use room temperature eggs for better volume and even mixing in your batter.
- Butter tip: For cakes, use room temperature butter (should dent when pressed). Melted butter creates a denser texture.
- Flour tip: Sift flour before measuring and do NOT overmix – this develops gluten and makes cakes tough.
- Vanilla tip: Use pure vanilla extract, not imitation – the flavor difference is significant in baking.
- Oven tip: Always preheat your oven fully and use an oven thermometer – most ovens run hot or cold.
🔄 Variations & Substitutions
This apple pancakes recipe is very flexible. Here are some tested options:
| If You Don’t Have… | Use This Instead | Notes |
|---|---|---|
| Butter | Coconut oil or ghee | Use equal amounts |
| Milk | Oat milk, almond milk, or coconut milk | Choose unsweetened for savory dishes |
| All-purpose flour | Gluten-free 1:1 flour blend | Works perfectly in most recipes |
| Cinnamon | Allspice or nutmeg (use less) | Warm spice flavor |
| Vegetable oil | Canola oil or sunflower oil | Neutral flavor oils |
📜 The History of This Dish
Cakes have been part of celebrations since ancient times. The ancient Greeks baked a type of honey bread, and the Romans created the first cheesecakes. However, the cakes we know today evolved in medieval Europe, when sugar became more available and baking techniques improved.
Birthday cakes with candles originated in 18th century Germany, where candles represented the “light of life.” Today, cakes are central to celebrations worldwide, from tiered wedding cakes to simple sheet cakes for family gatherings.
⚠️ Common Mistakes to Avoid
Even experienced cooks make these errors. Learn from others’ mistakes so your dish turns out perfect:
- Overmixing the batter: Once you add flour, mix only until just combined. Overmixing develops gluten, resulting in tough, dense baked goods instead of tender ones.
- Wrong butter temperature: “Softened” butter should dent when pressed but not be greasy. Melted butter creates a completely different texture. Leave butter out 30-45 minutes before baking.
- Cold eggs: Room temperature eggs incorporate better into batter and create more volume. Place eggs in warm water for 5 minutes if you forgot to take them out earlier.
- Opening the oven too often: Every time you open the oven door, temperature drops 25-50°F. This can cause cakes to fall and cookies to bake unevenly.
- Not preheating fully: Always wait until your oven reaches the target temperature before baking. An oven thermometer is worth the investment.
Remember: Cooking is a skill that improves with practice. Don’t be discouraged if your first attempt isn’t perfect!
🍳 Equipment You’ll Need
Having the right tools makes cooking easier and more enjoyable. Here’s what you need:
✅ Essential Equipment:
- Mixing bowls: At least 2 sizes for dry and wet ingredients
- Measuring cups & spoons: For accurate measurements
- Electric mixer or whisk: Stand mixer preferred, but hand mixer works
- Baking pan: 9×13 for brownies, round pans for cakes
💜 Helpful but Optional:
- Cooling rack: Prevents soggy bottoms
- Oven thermometer: Most ovens run hot or cold
- Kitchen scale: For precise flour measurements
Pro tip: You don’t need expensive equipment to cook great food. Focus on quality basics and add specialized tools as you need them.
📊 Nutritional Information
Approximate values per serving. Actual nutrition varies based on specific ingredients and portion sizes.
319
Calories
3-5g
Protein
35-45g
Carbs
12-18g
Fat
Note: This is a treat – enjoy it mindfully as part of a balanced diet!
✨ Health Benefits:
- Heart-healthy monounsaturated fats
For precise nutritional information, calculate based on your specific ingredients using a nutrition calculator.
🍽️ Serving Suggestions
Complete your meal with these perfect pairings:
🥗 Serve With:
- Fresh berries and whipped cream
- Maple syrup and butter
- Sliced bananas and Nutella
- Greek yogurt and honey
🥤 Beverage Pairing: Pair with coffee, tea, or a cold glass of milk.
Presentation tip: A beautiful presentation enhances the dining experience. Use colorful garnishes, attractive serving dishes, and consider the contrast of colors on the plate.
🎓 Expert Baking Insights
Take your baking to the next level with these professional techniques that transform a good recipe into an exceptional one:
🔬 Science explanation
Professional chefs prep all ingredients before cooking (mise en place) for a reason—it prevents burning while you scramble to chop. This single habit transforms chaotic cooking into a calm, enjoyable process.
⚗️ Exact temperature precision
Different parts of chicken cook at different rates. Breasts reach 165°F faster than thighs. Use a thermometer in the thickest part without touching bone. Consider separating pieces for more even cooking.
🎯 Make-ahead instructions
Season at each stage: salt the aromatics, season the protein before cooking, adjust the sauce, and finish with a final taste. Layered seasoning creates depth; last-minute salting just makes food salty.
Pro tip: Understanding concepts like slice, frosting, and moist will help you master not just this recipe, but improve your overall cooking skills.
🥡 How to Store Leftovers
Properly storing your apple pancakes recipe ensures it stays fresh and delicious for days.
🏠
Room Temp
3-5 days in a sealed box
❄️
Fridge
Up to 1 week sealed
🧊
Freezer
Up to 3 months – thaw in fridge
❓ Frequently Asked Questions
Here are answers to the most common questions about this apple pancakes recipe:
How long does it take to make Apple Pancakes?
This recipe takes 30 minutes total – 15 minutes for prep and 15 minutes for cooking. Perfect for a weeknight meal!
What ingredients do I need for Apple Pancakes?
The main ingredients are: 1 cup buttermilk or make your own*, 1 cup white whole wheat flour or regular whole wheat flour or all-purpose flour, 1 ½ teaspoons baking powder, ½ teaspoon baking soda, ¼ teaspoon ground cinnamon. Full measurements are in the recipe card above.
How do you store Apple Pancakes?
Store leftovers in an airtight container in the refrigerator for up to 3-4 days. Reheat in the microwave or oven until warmed through.
Can you make Apple Pancakes ahead of time?
This recipe has been tested and optimized for the best results. Follow the step-by-step instructions above for perfect results every time.
Why are my Apple Pancakes flat?
This recipe has been tested and optimized for the best results. Follow the step-by-step instructions above for perfect results every time.
How do you keep Apple Pancakes soft?
Store leftovers in an airtight container in the refrigerator for up to 3-4 days. Reheat in the microwave or oven until warmed through.
📖 Full Recipe Card
Here is the full apple pancakes recipe with all ingredients and instructions:

Apple Pancakes Recipe
Total Time: 30 minutes
Yield: 8 1x
Description
This apple pancake recipe incorporates freshly grated apple and ground cinnamon. These apple pancakes are wholesome, delicious and easy to make. Recipe yields 8 to 9 pancakes.
Ingredients
Scale
1 cup buttermilk or make your own*
1 cup white whole wheat flour or regular whole wheat flour or all-purpose flour
1 ½ teaspoons baking powder
½ teaspoon baking soda
¼ teaspoon ground cinnamon
¼ teaspoon salt
1 large egg
2 tablespoons unsalted butter, melted
2 tablespoons maple syrup or honey
1 teaspoon pure vanilla extract
1 cup grated Honeycrisp or Granny Smith apple (about 1 medium)
Avocado oil or vegetable oil, for greasing the pan
Instructions
In a medium bowl, whisk together the flour, baking powder, baking soda, cinnamon and salt.
In a smaller bowl, combine the buttermilk, egg, melted butter, maple syrup, and vanilla. Whisk until thoroughly blended.
Pour the liquid mixture into the flour mixture. Add the grated apple. Stir just until combined (a few small lumps of flour are okay). Let the batter rest for 5 minutes so your pancakes will be nice and fluffy.
Meanwhile, if you’re using an electric griddle, preheat it to 350 degrees Fahrenheit. Otherwise, heat a large stainless steel or nonstick skillet over medium-low heat. You’re ready to start cooking pancakes once a drop of water sizzles on contact with the hot surface. If necessary, lightly oil the cooking surface and wipe off the excess with a paper towel (nonstick surfaces likely won’t require any oil).
Scoop a scant ¼ cup of batter onto the warm skillet, leaving a couple of inches around each pancake for expansion. Cook until small bubbles form on the surface of the pancakes, 2 to 3 minutes (you’ll know it’s ready to flip when about ½-inch of the perimeter is matte instead of glossy). Flip the pancakes, then cook until lightly golden on both sides, 1 to 2 minutes more.
Repeat the process with the remaining batter, adding more oil and reducing the heat as necessary (I usually end up on low heat after a while—if the pancakes are turning too dark on the outside before they cook through, it’s too hot). Serve the pancakes immediately with toppings of your choice, or keep them warm in a 200 degree Fahrenheit oven.
Leftover pancakes can be stored in the refrigerator for up to 4 days, or frozen* for up to 2 months. To reheat, stack leftover pancakes and wrap them in a paper towel before gently reheating in the microwave.
Notes
Storage: Store in an airtight container at room temperature for up to 5 days, or freeze for up to 3 months.
Make Ahead: You can prepare the dough/batter up to 24 hours in advance and refrigerate until ready to bake.
Substitution: For a dairy-free version, use coconut oil or vegan butter in place of regular butter.
Pro Tip: Use a toothpick inserted in the center to test for doneness. It should come out with a few moist crumbs but no wet batter.
- Prep Time: 15 minutes
- Cook Time: 15 minutes
- Category: Breakfast
- Method: Breakfast
- Cuisine: American
Did you make this apple pancakes recipe?
I would love to hear how it turned out! Leave a comment and rate it ⭐⭐⭐⭐⭐
Last updated: January 27, 2026 | This post may have affiliate links.