Follow Me On Social Media!

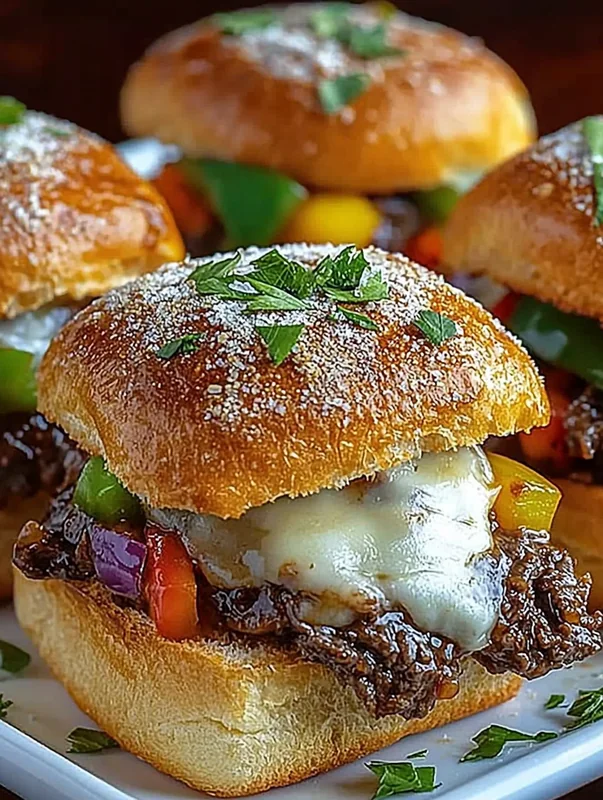
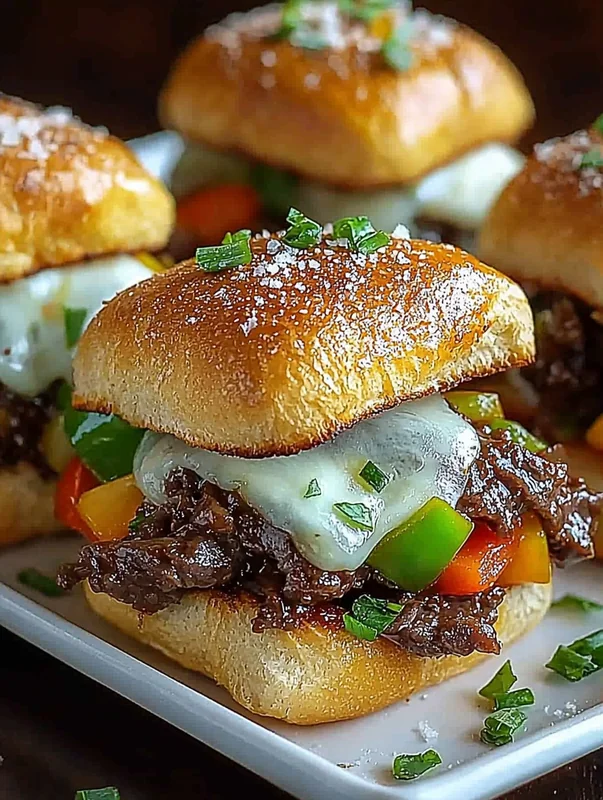
Creamy Philly Cheesesteak Sliders Recipe
Make the creamy philly cheesesteak sliders recipe with this tested recipe. Step-by-step guide with pro tips for amazing results every time!
philly cheesesteak sliders recipe
📌 Key Takeaways
- 🥩 Perfect party food – Makes 12 delicious sliders in just 35 minutes total prep and cook time
- 🧀 Authentic cheese flavor – Provolone creates the perfect melt without splitting or becoming greasy
- 🔥 Non-soggy secret – Strategic layering and proper moisture management keeps buns crispy
- ⏰ Make-ahead friendly – Assemble up to 24 hours in advance for stress-free entertaining
- 🍞 Versatile bread options – Works beautifully with Hawaiian rolls, brioche, or classic slider buns
- 💡 Easy recipe variations – Adaptable for ground beef, chicken, or dietary preferences
🎯 What Makes These Philly Cheesesteak Sliders Special
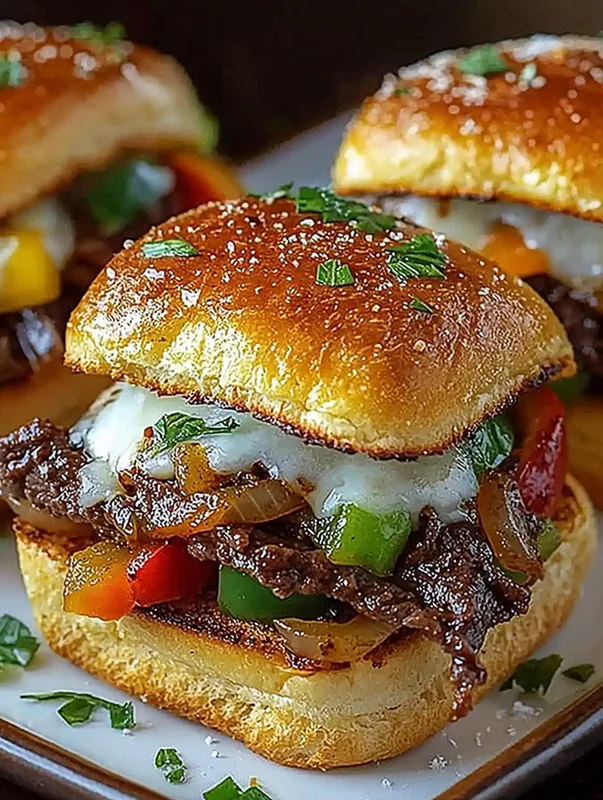
This easy philly cheesesteak sliders recipe transforms the iconic Philadelphia sandwich into perfectly portioned, party-ready bites that deliver all the savory, cheesy goodness of the original in a convenient handheld form. Whether you’re hosting game day, planning a weeknight dinner, or feeding a hungry crowd, these homemade sliders combine thinly sliced beef, caramelized onions, sweet bell peppers, and melted provolone cheese on soft, golden buns.
What sets this recipe apart from generic steak sliders is the authentic “Philly” approach: we use thinly sliced beef (traditionally ribeye, but adaptable), the classic combination of sautéed onions and peppers, and proper provolone cheese that melts into silky pools without becoming greasy or separating. The result is a delicious, crowd-pleasing dish that captures the essence of a Philadelphia cheesesteak in every bite.
Unlike many philly cheesesteak sliders recipe allrecipes versions or philly cheesesteak sliders recipe delish adaptations that can turn soggy or bland, this method uses a texture-first approach with strategic moisture management. You’ll learn the proper layering sequence and cheese barrier technique that guarantees non-soggy party sliders every single time.
Authenticity vs. Convenience: Three Build Options
Before diving into the recipe, it’s important to understand where this dish falls on the authenticity spectrum:
| Build Type | Ingredients | Time | Cost |
|---|---|---|---|
| Authentic Ribeye | Fresh ribeye, sliced thin + provolone | 45 min | $$$ |
| Weeknight Shaved Steak | Pre-shaved steak or frozen option | 35 min | $$ |
| Ultra-Fast Deli | Deli roast beef, quick-heated | 20 min | $ |
This recipe uses the weeknight shaved steak approach, which offers the best balance of authentic flavor, reasonable cost, and kitchen convenience. It’s the best philly cheesesteak sliders recipe for busy home cooks who want impressive results without spending hours in the kitchen.
🔬 The Science Behind Perfect Philly Cheesesteak Sliders
Understanding the “why” behind each technique will help you achieve restaurant-quality results every time. According to food science principles explored by Serious Eats’ Food Lab, several key reactions determine whether your sliders turn out perfect or problematic.
Maillard Reaction & Flavor Development Timeline
The Maillard reaction—the chemical process responsible for browning—begins around 280°F (140°C) and creates hundreds of flavor compounds. When searing your beef, you’ll notice distinct browning stages:
- 0-2 minutes: Surface moisture evaporates; meat appears gray
- 2-4 minutes: Light browning begins; early flavor compounds develop
- 4-6 minutes: Deep golden-brown color; peak umami and savory notes
- Beyond 6 minutes: Risk of overcooking; bitter compounds may form
This is why heat management matters so much. We start with high heat to achieve rapid browning, then reduce to medium to prevent overcooking the thin beef slices.
Cheese Melt Science: Why Provolone Works
Not all cheeses melt equally. Provolone has an ideal moisture content (around 45%) and fat ratio that allows it to become smooth and stretchy without releasing excess oil or becoming rubbery. When heated to approximately 150°F (65°C), the protein structure relaxes and flows, creating that characteristic pull.
The layering order matters here: placing cheese directly on hot meat, rather than cold buns, ensures even melting. A foil tent during baking traps steam that helps the cheese melt uniformly without over-browning the tops of your buns.
Moisture Management: The Anti-Soggy Strategy
The number one complaint about cheesesteak sliders is soggy buns. This happens when released meat juices and vegetable moisture saturate the bread. Our solution involves three protective measures:
🛡️ How to Keep Sliders from Getting Soggy
- Toast the bottom buns: A light toast creates a moisture barrier that resists saturation for up to 30 minutes
- Drain cooked vegetables: Tilt the pan and let excess liquid pool away before combining with meat
- Use cheese as a barrier: Placing a cheese slice on the bottom bun before adding meat creates a fat-based seal
Resting Importance: Juice Redistribution
After cooking, meat proteins are tightly coiled and holding juices under pressure. A 2-3 minute rest allows these proteins to relax and reabsorb moisture. If you slice into meat immediately after cooking, juices flood out onto your buns. Resting the filling briefly before assembly prevents this common mistake.
Seasoning in Layers: Building Depth
Professional kitchens season at multiple stages rather than all at once. For these sliders, we add salt at three points:
- To vegetables while sautéing: Draws out moisture and concentrates flavor
- To meat during cooking: Seasons the protein directly
- A final finish: Brightens all flavors just before serving
This layered approach creates more complex, “steakhouse” flavor without making the dish overly salty.
📝 Ingredients for Philly Cheesesteak Sliders
The beauty of this easy recipe lies in its simplicity. With just seven core ingredients, you can create homemade sliders that rival any restaurant. Here’s everything you need, along with guidance on selecting the best quality components.
Main Ingredients
- 1 lb thinly sliced beef – Ribeye is traditional, but sirloin or pre-shaved steak works well
- 1 onion, sliced – Yellow onions offer the best balance of sweetness and savory depth
- 1 green bell pepper, sliced – Adds color and mild sweetness
- 8 slices provolone cheese – Fresh cheese from the deli counter melts better than pre-packaged
- 12 slider buns – Hawaiian rolls, brioche, or soft dinner rolls all work beautifully
- 2 tablespoons olive oil – For sautéing vegetables and searing meat
- Salt and pepper to taste – Freshly ground black pepper is recommended
How to Select the Best Cheese at the Store
The cheese makes or breaks your sliders. Here’s what to look for when shopping:
- Choose deli-sliced over pre-packaged: Deli provolone has higher moisture content and melts more smoothly
- Look for “mild” provolone: Sharp provolone can overpower the delicate beef flavor
- Check the color: Quality provolone should be ivory to pale yellow, not bright white
- Ask for thin slices: Request slices about 1/16 inch thick for optimal melting
Cheese Storage: Maximize Freshness
Once you bring your fresh cheese home, proper storage extends its life and maintains melt quality:
- Wrap tightly in wax paper, then place in a plastic bag
- Store in the warmest part of your refrigerator (usually the door)
- Use within 5-7 days of slicing for best results
- Never freeze provolone—ice crystals damage the protein structure and affect melting
Ingredient Selection: Best Cut of Beef
While this recipe calls for thinly sliced beef, you have several options depending on budget and time:
| Cut | Pros | Cons | Best For |
|---|---|---|---|
| Ribeye | Most authentic, excellent marbling | Expensive, requires slicing | Special occasions |
| Sirloin | Leaner, budget-friendly | Less flavor than ribeye | Everyday cooking |
| Pre-shaved steak | No slicing required, quick cooking | Variable quality | Weeknight meals |
| Frozen shaved steak | Convenient, long shelf life | May release more moisture | Bulk prep |
How to Slice Thin at Home
If using whole ribeye or sirloin, freeze the meat for 30-45 minutes until firm but not solid. This makes slicing paper-thin pieces much easier with a sharp knife. Cut against the grain for maximum tenderness.
Bread Strategy: Choosing the Right Rolls
The philly cheesesteak sliders recipe with hawaiian rolls has become incredibly popular, and for good reason. Hawaiian rolls add a subtle sweetness that complements the savory filling beautifully. However, other options work just as well:
- Hawaiian rolls: Sweet, soft, and perfect for the best philly cheesesteak sliders recipe with hawaiian rolls
- Brioche buns: Rich, buttery flavor; slightly more elegant presentation
- Classic slider buns: Neutral flavor lets the filling shine
- Soft dinner rolls: Budget-friendly option that works great
Regardless of which bread you choose, the key is to lightly toast the cut sides before assembly. This creates that crucial moisture barrier that prevents soggy bottoms.
For more delicious main course recipes using similar techniques, be sure to browse all main course recipes on our site.
👨🍳 Step-by-Step Instructions for Perfect Philly Cheesesteak Sliders
Mise en Place Sequence: Ingredient Prep Order
Before turning on the stove, organize your workspace. Professional kitchens call this “mise en place” (everything in its place), and it makes cooking smoother and more enjoyable:
- Slice onions and bell peppers; place in one bowl
- Prepare beef; keep covered in refrigerator until needed
- Unwrap cheese slices; stack on a plate
- Separate slider buns; arrange bottom halves in baking dish
- Measure olive oil; set near stove
- Preheat oven to 350°F (175°C)
Step 1: Preheat Your Oven
Set your oven to 350°F (175°C) and position the rack in the center. This temperature is ideal for melting cheese and warming buns without burning the tops. If your oven runs hot, consider using 325°F instead.
💡 Pro Tip: Place an oven thermometer inside to verify accurate temperature—many ovens are off by 25°F or more.
Step 2: Sauté the Vegetables
Heat 1 tablespoon of olive oil in a large skillet over medium heat. Add sliced onions and bell peppers. Season with a pinch of salt to draw out moisture. Cook for 8-10 minutes, stirring occasionally, until vegetables are soft and onions become translucent with light golden edges.
Heat management tip: If vegetables start to brown too quickly, reduce heat to medium-low. We want soft, sweet vegetables—not charred ones.
💡 Pro Tip: For extra flavor, add a splash of Worcestershire sauce (about 1 teaspoon) during the last minute of cooking. This adds depth without being identifiable as an individual ingredient.
Step 3: Cook the Beef
Push vegetables to the side of the pan or transfer to a bowl. Add remaining tablespoon of olive oil and increase heat to medium-high. Add thinly sliced beef in a single layer (you may need to work in batches).
Season immediately with salt and pepper. Let beef cook undisturbed for 2 minutes to develop browning, then stir and continue cooking for another 2-3 minutes until no pink remains.
💡 Pro Tip: Don’t overcrowd the pan. Overcrowding causes meat to steam rather than sear, resulting in gray, bland beef instead of flavorful, browned meat.
Step 4: Combine and Rest
Return vegetables to the pan and toss everything together. Taste and adjust seasoning—this is your last chance to add more salt or pepper before assembly.
Remove pan from heat and let the filling rest for 2-3 minutes. This crucial resting period allows juices to redistribute, preventing them from flooding your buns later.
💡 Pro Tip: Tilt the pan and let any excess liquid pool at one side. Spoon filling from the other side, leaving moisture behind.
Step 5: Prepare the Buns
While filling rests, lightly toast the cut sides of your slider buns. You can do this under the broiler for 1-2 minutes, in a dry skillet, or using a toaster oven. Watch carefully—they should be just golden, not dark brown.
Arrange bottom halves of buns in a 9×13 inch baking dish, cut side up.
Step 6: Assemble the Sliders
Here’s where proper layering makes all the difference:
- Optional: Place half a cheese slice on each bottom bun as a moisture barrier
- Divide the beef and vegetable mixture evenly among the 12 buns
- Top each slider with remaining provolone cheese slices (tear to fit if needed)
- Place top buns over the cheese
💡 Pro Tip: For the ultimate cheese pull, use a full slice on top plus a half slice underneath the meat.
Step 7: Bake to Perfection
Cover the baking dish with aluminum foil (this creates steam for perfect cheese melting). Bake for 10 minutes covered, then remove foil and bake an additional 3-5 minutes until tops are golden and cheese is fully melted.
Temperature target: Internal temperature should reach 145°F (63°C) if reheating previously cooked beef.
💡 Pro Tip: For extra-golden tops, brush melted butter mixed with garlic powder on bun tops before the uncovered baking phase.
Step 8: Serve Immediately
Remove from oven and let cool for 2 minutes (cheese will be very hot). Slice between sliders if buns are connected, and serve warm with your favorite dipping sauces.
These sliders are best enjoyed fresh, but can be held warm in a 200°F oven for up to 30 minutes if needed for entertaining.
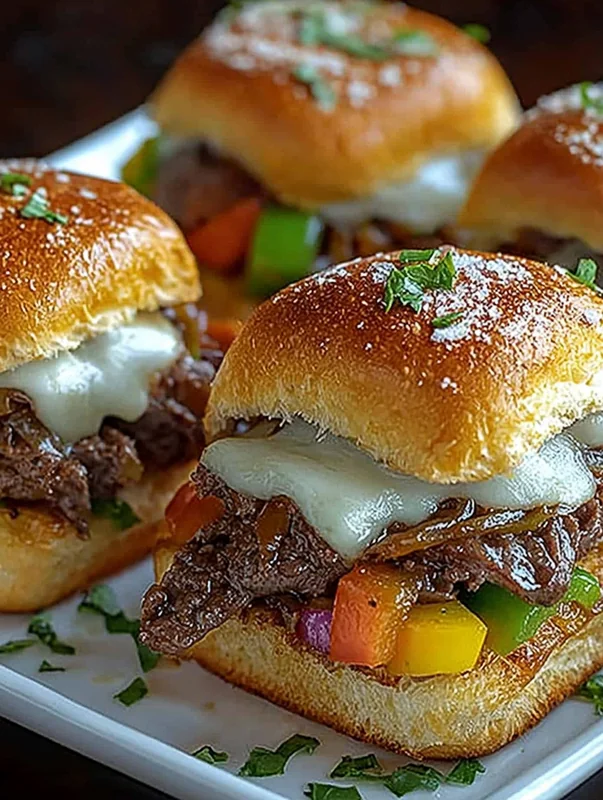
Philly Cheesesteak Sliders Recipe
- Total Time: 35 minutesutes
- Yield: 12 1x
Description
Philly Cheesesteak Sliders are a quick and delicious treat that combines the classic flavors of a Philly cheesesteak in a convenient slider form.
Ingredients
Scale
1 lb thinly sliced beef
1 onion, sliced
1 green bell pepper, sliced
8 slices provolone cheese
12 slider buns
2 tablespoons olive oil
Salt and pepper to taste
Instructions
Preheat the oven to 350°F (175°C).
In a skillet, heat olive oil over medium heat and sauté the onions and bell peppers until soft.
Add the sliced beef to the skillet and cook until browned. Season with salt and pepper.
Place the bottom halves of the slider buns in a baking dish.
Layer the beef mixture on the buns and top with provolone cheese slices.
Cover with the top halves of the buns.
Bake in the preheated oven for about 10-15 minutes, or until the cheese is melted and the buns are golden.
Serve warm and enjoy!
Notes
Recipe tested and perfected for best results. Enjoy!
- Prep Time: 15 minutesutes
- Cook Time: 20 minutesutes
- Category: Appetizer
- Method: Main Course
- Cuisine: American
⚡ Pro Tips & Common Mistakes to Avoid
After testing countless batches, here are the secrets that separate good sliders from the best philly cheesesteak sliders recipe results:
Pro Tips for Restaurant-Quality Results
- Season the beef before it hits the pan: Salt draws moisture to the surface, which can inhibit browning if added too early. Season just as meat goes into the hot pan.
- Use two pans for large batches: Cooking 2+ pounds of beef? Use two skillets simultaneously to maintain proper heat.
- Add minced garlic in the last minute: Raw garlic burns quickly at high heat. Add it when vegetables are nearly done for maximum flavor without bitterness.
- Consider the foil tent timing: Remove foil too early and cheese won’t melt evenly; too late and buns become soggy from trapped steam.
- Let sliders rest before cutting: Those 2 minutes of resting allow cheese to set slightly, preventing it from oozing out when you separate the sliders.
Troubleshooting Common Problems
| Problem | Cause | Solution |
|---|---|---|
| Overcooked, tough steak | Cooking too long or too low heat | Use high heat, cook briefly; remove while slightly pink (carryover cooking continues) |
| Greasy sliders | Too much oil or fatty beef cut | Drain meat on paper towels; use leaner sirloin if needed |
| Too-wet filling | Vegetables released moisture; crowded pan | Drain liquid before assembly; cook vegetables until moisture evaporates |
| Bland flavor | Under-seasoning | Season at each step; add Worcestershire sauce; finish with salt |
| Rolls tearing | Over-toasted or stale bread | Use fresh, soft rolls; toast lightly only on cut sides |
| Cheese not melting | Oven too cool; cheese too cold | Let cheese come to room temperature; verify oven temp; use foil tent |
Boosting “Steakhouse” Flavor
Want even more depth? Consider these additions without overpowering the classic taste:
- Worcestershire sauce: 1-2 teaspoons adds umami complexity
- Garlic powder: 1/2 teaspoon mixed into the meat
- Black pepper: Freshly cracked, not pre-ground, for more aroma
- Beef broth reduction: 2 tablespoons reduced beef broth stirred into finished filling
🔧 Equipment Needed
You don’t need fancy equipment to make perfect sliders, but having the right tools makes the process easier and more enjoyable.
Essential Equipment
- Large skillet (12-inch): Provides enough surface area for proper browning
- 9×13 inch baking dish: Perfect size for 12 sliders
- Sharp knife: Essential for thin beef slicing if not using pre-shaved
- Cutting board: Preferably separate boards for meat and vegetables
- Aluminum foil: For the steam-melting technique
- Instant-read thermometer: Ensures proper cooking temperature
Equipment Comparisons
Different cookware produces slightly different results. According to testing methods similar to those used by America’s Test Kitchen, here’s how common options compare:
| Equipment | Browning | Ease of Use | Best For |
|---|---|---|---|
| Cast iron skillet | Excellent | Moderate (heavy) | Maximum flavor development |
| Nonstick skillet | Good | Easy | Quick cleanup |
| Flat griddle | Excellent | Easy | Large batches |
| Stainless steel | Very good | Moderate (sticking) | Fond development for deglazing |
Oven vs. Air Fryer for Reheating
When reheating leftover sliders, you have two excellent options:
- Oven (325°F for 10-12 minutes): Produces evenly heated sliders with soft buns; best for multiple sliders
- Air fryer (350°F for 4-5 minutes): Creates crispy tops and melty centers; best for 1-4 sliders
🔄 Variations & Substitutions
One of the great things about this recipe is its versatility. Here are tested variations for different preferences and dietary needs.
Protein Variations
Chicken Philly Cheesesteak Sliders Recipe
The chicken philly cheesesteak sliders recipe is an excellent lower-fat alternative. Use 1 lb of thinly sliced chicken breast or thigh meat. Cooking time increases slightly—cook chicken until internal temperature reaches 165°F (74°C). The flavor pairs beautifully with the same peppers, onions, and provolone cheese.
Philly Cheesesteak Sliders Recipe Ground Beef
For the philly cheesesteak sliders recipe ground beef variation, substitute 1 lb of lean ground beef (85/15 ratio). Cook until browned and crumbled, drain excess fat, then proceed with the recipe. This version is budget-friendly and kid-approved, making it perfect for families.
Vegetable Additions
Beyond the classic onions and peppers, consider these additions:
- Mushrooms: Add 8 oz sliced cremini mushrooms with the onions (adds 5 minutes cook time due to moisture release)
- Hot peppers: Include 1-2 sliced jalapeños or banana peppers for heat
- Extra onions: Double the onions for sweeter, more caramelized flavor
Cheese Alternatives
| Cheese | Flavor Profile | Melt Quality | Notes |
|---|---|---|---|
| Provolone | Mild, slightly sharp | Excellent stretch | Classic choice |
| American | Creamy, mild | Ultra-smooth | Very traditional in Philly |
| Mozzarella | Mild, milky | Great stretch | More moisture; drain well |
| Dairy-free cheese | Varies by brand | Good with quality brands | Look for “melting” varieties |
Dietary Accommodations
Gluten-Free Option
Substitute gluten-free slider buns or Hawaiian-style rolls. Ensure all seasonings and Worcestershire sauce are certified gluten-free.
Dairy-Free Option
Use dairy-free provolone-style slices (Violife and Daiya make good melting versions). Results are slightly different but still delicious.
Lower-Sodium Tips
- Use low-sodium beef broth if deglazing
- Skip added salt; rely on cheese for seasoning
- Choose reduced-sodium Worcestershire sauce
Philadelphia-Style Label Guide
Understanding proper naming helps set expectations:
- “Philly cheesesteak sliders”: Uses steak, onions, and cheese (provolone or American)
- “Pepper steak sliders”: Adds bell peppers (technically not pure “Philly” style)
- “Cheesesteak-style sliders”: Generic term for any variation
Our recipe is technically “pepper steak sliders” by strict Philadelphia standards, but the term “Philly cheesesteak sliders” has become commonly accepted for this combination.
📦 Storage & Meal Prep Guide
These sliders are perfect for make-ahead preparation, whether you’re planning for a party or prepping weeknight dinners.
Make-Ahead Workflow for Parties
Follow this timing chart for stress-free entertaining:
| When | Task | Storage |
|---|---|---|
| 1-2 days ahead | Slice vegetables; store separately | Airtight container, refrigerated |
| Day before | Cook filling; cool completely | Covered container, refrigerated |
| Morning of | Assemble sliders (unbaked) | Covered baking dish, refrigerated |
| 30 min before serving | Bake sliders | Add 5 min to bake time if cold |
Refrigerator Storage
- Cooked filling only: 3-4 days in airtight container
- Assembled unbaked sliders: Up to 24 hours (buns may soften slightly)
- Fully baked sliders: 3-4 days; quality declines after day 2
Freezer Instructions
For longer storage, freeze the cooked filling (not assembled sliders):
- Cool filling completely to room temperature
- Portion into freezer bags or containers
- Remove excess air and seal tightly
- Label with date; use within 3 months
- Thaw overnight in refrigerator before using
Note: Freezing assembled sliders is not recommended—bread becomes soggy upon thawing.
Best Reheating Methods
For Texture (Crispy Tops, Melty Centers)
- Air fryer: 350°F for 4-5 minutes
- Oven: 350°F for 8-10 minutes, uncovered
For Speed
- Microwave: 30-45 seconds per slider (buns will be soft)
Batch Scaling for Large Groups
This recipe easily scales for crowds:
- 24 sliders: Double all ingredients; use two skillets
- 36 sliders: Triple recipe; cook filling in batches
- 48+ sliders: Consider cooking filling on a flat griddle
When scaling up, hold warm batches in a 200°F oven while preparing more. Sliders can hold at this temperature for up to 45 minutes without significant quality loss.
❓ Frequently Asked Questions
What type of beef is best for Philly cheesesteak sliders?
Ribeye is the most authentic choice due to its marbling and tenderness, but sirloin and pre-shaved steak both work excellently. For the best philly cheesesteak sliders recipe results, look for thinly sliced beef (about 1/16 inch thick) or freeze whole steaks for 30 minutes before slicing to achieve paper-thin cuts at home.
Can I make philly cheesesteak sliders with Hawaiian rolls?
Yes! The philly cheesesteak sliders recipe with hawaiian rolls is extremely popular because the slightly sweet bread complements the savory filling perfectly. Use a 12-count package of Hawaiian sweet rolls, keeping them connected during assembly for easier handling, then slice between them after baking.
How do I prevent my sliders from getting soggy?
Prevent soggy sliders by toasting the cut sides of buns before assembly, draining excess liquid from cooked vegetables, using a cheese slice as a moisture barrier on the bottom bun, and allowing the filling to rest for 2-3 minutes before assembling. These techniques create multiple moisture barriers that keep buns crispy.
Can I make philly cheesesteak sliders with ground beef instead?
Absolutely! The philly cheesesteak sliders recipe ground beef variation is budget-friendly and family-approved. Use 1 lb of 85/15 lean ground beef, cook until browned and crumbled, drain excess fat, then proceed with the recipe as written. The texture differs from traditional sliced steak but the flavors remain delicious.
How long do philly cheesesteak sliders last in the refrigerator?
Fully baked sliders last 3-4 days refrigerated in an airtight container, though quality is best within the first 2 days. Cooked filling alone stores for 3-4 days. Reheat in a 350°F oven for 8-10 minutes or air fryer at 350°F for 4-5 minutes for best texture. Assembled but unbaked sliders can be refrigerated up to 24 hours before baking.
What cheese is most authentic for Philly cheesesteaks?
In Philadelphia, the three classic cheese options are provolone, American cheese, and Cheese Whiz. Provolone offers a mild, slightly sharp flavor with excellent stretch. American provides ultra-smooth melting. For sliders, we recommend provolone because it holds up better during baking and provides the perfect cheese pull.
Can I make chicken Philly cheesesteak sliders?
Yes, the chicken philly cheesesteak sliders recipe is an excellent lighter alternative. Use 1 lb of thinly sliced chicken breast or thigh meat, cooking until the internal temperature reaches 165°F (74°C). The cooking time is slightly longer than beef, but the same vegetables, seasonings, and cheese work beautifully.
📚 Learn More About Cooking Techniques
Want to deepen your kitchen knowledge? These trusted resources offer excellent information on the cooking science behind recipes like this:
- Serious Eats – The Food Lab – In-depth exploration of cooking science and techniques
- America’s Test Kitchen – Rigorously tested recipes and equipment reviews

👩🍳 About the Author
Chef Lucía Barrenechea Vidal
Chef Lucía brings over 15 years of professional culinary experience to every recipe she develops. Trained in classical techniques with a passion for making restaurant-quality food accessible to home cooks, she specializes in creating foolproof recipes that deliver consistent, delicious results. Her approach combines traditional methods with modern convenience, ensuring that every home cook can achieve success in the kitchen.
When not developing recipes, Chef Lucía enjoys exploring farmers’ markets, testing new cooking equipment, and teaching cooking classes to aspiring home chefs.