Follow Me On Social Media!


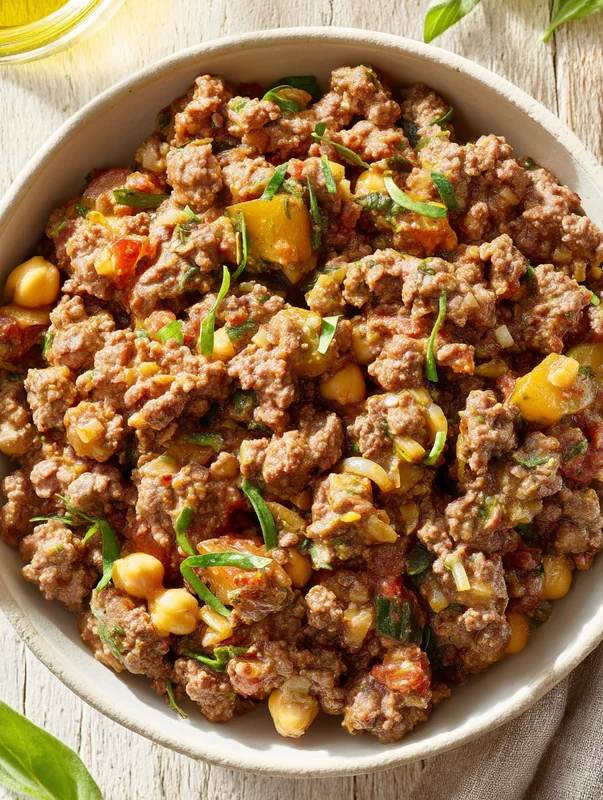
Unparalleled Slow-Roasted Garlic Honey Beef Shoulder Recipe – 5-Star Family Favorite
Make the unparalleled slow-roasted garlic honey beef shoulder recipe with this tested recipe. Step-by-step guide with pro tips for amazing results every time!
slow-roasted garlic honey beef shoulder recipe
📌 Key Takeaways
- 🕐 Total time: 4 hours 15 minutes (15 min prep + 4 hours cooking)
- 🔥 Low and slow at 300°F (150°C) breaks down tough collagen into silky gelatin
- 🍯 Honey + garlic combination creates a sticky, caramelized crust that’s impossible to resist
- 🥩 Beef shoulder is one of the most affordable cuts that delivers restaurant-quality results
- ⏰ Resting for 15 minutes allows juices to redistribute, ensuring moist slices
- ✨ Perfect for meal prep – stores beautifully and tastes even better the next day
🎯 Why This Slow-Roasted Garlic Honey Beef Shoulder Recipe Is a Game-Changer
This slow-roasted garlic honey beef shoulder recipe transforms an affordable, tough cut of meat into a melt-in-your-mouth masterpiece with a gorgeous caramelized exterior and incredibly tender, juicy interior. The magic happens when you combine the natural sweetness of honey with aromatic garlic and let time work its wonders in a low-temperature oven.
If you’ve ever wondered how restaurants achieve that perfect combination of tender meat with a sticky, lacquered glaze, this homemade recipe reveals all the secrets. The beef shoulder, also known as chuck roast in some regions, is loaded with collagen-rich connective tissue that breaks down during the long cooking process, creating that succulent, pull-apart texture we all crave.
This easy recipe has become a family favorite in my kitchen because it’s essentially hands-off cooking. Once you’ve done the 15-minute prep, your oven does all the heavy lifting. The result? A delicious centerpiece that’s perfect for Sunday dinners, holiday gatherings, or even batch cooking for busy weeknights.
What sets this recipe apart from others is the layered seasoning approach. We don’t just slap on a marinade and hope for the best – we build beef flavor through strategic timing, proper heat management, and understanding the science behind why certain techniques work. Whether you’re a seasoned home cook or just starting your kitchen journey, this foolproof guide will walk you through every step.

🔬 The Science Behind Perfect Slow-Roasted Beef Shoulder
Understanding why this recipe works will make you a better cook. As explained by food scientists at Serious Eats’ Food Lab, the magic of slow-roasting tough cuts like beef shoulder lies in collagen conversion.
The Collagen-to-Gelatin Transformation
Beef shoulder contains significant amounts of collagen – a tough, structural protein that makes raw or quickly-cooked shoulder chewy and unpleasant. However, when collagen is exposed to temperatures between 160°F and 180°F (71°C to 82°C) for extended periods, it undergoes hydrolysis, converting into gelatin.
This gelatin is what creates that silky, unctuous mouthfeel and the “fall-apart” texture we’re after. At our cooking temperature of 300°F (150°C), the meat’s internal temperature slowly climbs into this optimal zone and stays there, allowing maximum collagen breakdown without drying out the meat.
The Maillard Reaction and Caramelization
The honey in our glaze serves a dual purpose. First, the natural sugars caramelize when exposed to high heat during the final uncovered roasting phase, creating that beautiful mahogany crust. Second, honey contains enzymes that help tenderize the meat during the cooking process.
The Maillard reaction – that complex chemical interaction between amino acids and reducing sugars – occurs when we remove the foil for the final 30 minutes. This is when hundreds of flavor compounds develop, giving the exterior that complex, savory-sweet taste that makes this dish irresistible.
Flavor Development Timeline: Understanding the Browning Stages
During the 4-hour cooking process, flavor develops in distinct stages:
- Hours 1-2: Aromatics release, garlic mellows, and initial moisture release occurs
- Hours 2-3: Collagen begins breaking down, meat starts to tenderize
- Hours 3-4: Full collagen conversion, fat renders, flavors concentrate
- Final 30 minutes: Caramelization and crust formation
Why Resting Is Non-Negotiable
The 15-minute rest period isn’t just a suggestion – it’s essential science. When meat cooks, muscle fibers contract and squeeze moisture toward the center. Cutting immediately releases this pooled liquid onto your cutting board instead of your palate. Resting allows the fibers to relax and reabsorb those delicious juices, ensuring every bite is moist and flavorful.
🥩 How to Select the Best Beef Shoulder at the Store
Choosing the right cut is the foundation of this perfect slow-roasted garlic honey beef shoulder recipe. Here’s what to look for when shopping for fresh beef:
Visual Inspection
- Color: Look for beef that’s bright cherry-red when freshly cut. Vacuum-packed beef may appear darker (purplish-red) but should bloom to red when exposed to air
- Marbling: Choose cuts with visible white fat streaks throughout the meat. This intramuscular fat bastes the meat from within during cooking
- Fat cap: A layer of external fat (about ½ inch) is desirable – it protects the meat and adds flavor
- Avoid: Brown or gray spots, excessive liquid in packaging, or any off-putting odors
Labeling to Look For
According to America’s Test Kitchen, beef shoulder may be labeled differently depending on your region:
- Beef chuck shoulder roast
- Shoulder clod roast
- English roast
- Cross-rib roast
All of these work beautifully for this recipe. Aim for a 3-4 pound piece for optimal results.
Beef Storage: Maximize Freshness
If not cooking immediately:
- Refrigerator: Store in the coldest part (usually the back, bottom shelf) for up to 3-5 days
- Freezer: Wrap tightly in plastic wrap, then foil, and freeze for up to 6 months
- Thawing: Always thaw in the refrigerator (24-48 hours for a 4 lb roast) – never at room temperature
📝 Ingredients Breakdown for Slow-Roasted Garlic Honey Beef Shoulder
Before diving into cooking, let’s practice proper mise en place sequence – the French culinary term for “everything in its place.” Having all ingredients prepped and measured before you start ensures smooth execution and better results.
🥘 Complete Ingredient List
For the Beef:
- 3-4 lbs beef shoulder – the star of the show, choose well-marbled meat
- 1 tablespoon salt – kosher salt preferred for even distribution
- 1 teaspoon black pepper – freshly ground for best flavor
For the Honey Garlic Glaze:
- 1 cup honey – pure, raw honey delivers the best caramelization
- 10 cloves garlic, minced – don’t skimp! Garlic mellows beautifully during roasting
- 2 tablespoons olive oil – helps distribute seasonings and promotes browning
For the Aromatics:
- 1 teaspoon thyme – dried works well; use 1 tablespoon if fresh
- 1 teaspoon rosemary – pairs perfectly with beef’s robust flavor
For the Braising Liquid:
- 1 cup beef broth – low-sodium recommended for better control over seasoning
This homemade recipe uses simple pantry staples you likely already have. The magic is in the technique and patience, not exotic ingredients. If you enjoy honey-glazed dishes, you might also love this Practical Hot Honey-Glazed Salmon Recipe for a quicker weeknight option.
Ingredient Prep Order (Mise en Place Sequence)
Prepare ingredients in this order for maximum efficiency:
- First: Remove beef from refrigerator 30-60 minutes before cooking to take off the chill
- Second: Mince the garlic (the most time-consuming prep task)
- Third: Measure out honey, olive oil, and dried herbs
- Fourth: Combine glaze ingredients in a bowl
- Fifth: Measure beef broth and set aside
- Last: Pat beef dry with paper towels right before seasoning

👨🍳 Step-by-Step Instructions for Perfect Slow-Roasted Beef Shoulder
Follow these detailed cooking tips for restaurant-quality results every time. This easy recipe builds flavor through seasoning in layers – each step enhances the previous one.
Step 1: Preheat and Prepare Your Oven
Preheat your oven to 300°F (150°C). This temperature is crucial – it’s hot enough to cook the meat thoroughly while low enough to allow gradual collagen breakdown.
💡 Pro Tip: Use an oven thermometer to verify your oven’s actual temperature. Many ovens run 25-50 degrees off their dial setting, which can significantly affect results.
Step 2: Create the Honey Garlic Glaze
In a medium bowl, combine:
- 1 cup honey
- 10 cloves minced garlic
- 2 tablespoons olive oil
- 1 tablespoon salt
- 1 teaspoon black pepper
- 1 teaspoon thyme
- 1 teaspoon rosemary
Whisk until fully combined. The mixture should be thick but spreadable.
💡 Pro Tip: Warm the honey slightly (10 seconds in microwave) if it’s crystallized – this helps it combine more easily with other ingredients.
Step 3: Prepare and Season the Beef
Pat the beef shoulder completely dry with paper towels. This step is critical – moisture on the surface prevents proper adhesion of the glaze and inhibits caramelization later.
Using your hands or a brush, apply the honey garlic mixture generously over all surfaces of the beef, including the sides and any crevices. Really massage it in!
💡 Pro Tip: Don’t forget to season inside any folds or natural seams in the meat. Flavor should penetrate everywhere.
Step 4: Set Up the Roasting Pan
Place the seasoned beef shoulder in a heavy roasting pan or Dutch oven. Pour 1 cup of beef broth around (not over) the meat.
The broth creates a humid environment that prevents the meat from drying out during the long cooking process. It also catches the delicious drippings for gravy later.
💡 Pro Tip: If you don’t have a proper roasting pan, a 9×13 baking dish with a tight-fitting foil cover works perfectly.
Step 5: Cover and Begin Slow Roasting
Cover the pan tightly with heavy-duty aluminum foil. The seal should be as tight as possible to trap steam and create a braising environment.
Place in the preheated oven and roast for 3-4 hours. The meat is ready when it’s fork-tender – a fork should slide in and out with no resistance.
💡 Pro Tip: Resist the urge to peek! Every time you open the oven and remove the foil, you lose heat and moisture, extending cooking time.
Step 6: Caramelize the Top
After 3-4 hours, carefully remove the foil (watch for steam!). The beef should be incredibly tender and swimming in delicious juices.
Return to the oven uncovered for an additional 30 minutes. This is when the magic happens – the honey glaze caramelizes into a gorgeous, sticky crust.
💡 Pro Tip: For extra caramelization, brush some of the pan juices over the top halfway through this final roasting phase.
Step 7: Rest Before Serving
Remove the beef from the oven and tent loosely with foil. Let it rest for 15 minutes before slicing or pulling.
This crucial step allows the juices to redistribute throughout the meat, ensuring every bite is moist and flavorful.
💡 Pro Tip: While the meat rests, strain the pan juices into a saucepan and reduce by half for an incredible sauce.

Slow-Roasted Garlic Honey Beef Shoulder Recipe
- Total Time: 4 hours 15 minutesutes
- Yield: 1 1x
Description
A delicious and tender slow-roasted beef shoulder infused with garlic and honey, perfect for a hearty meal.
Ingredients
Scale
3–4 lbs beef shoulder
1 cup honey
10 cloves garlic, minced
2 tablespoons olive oil
1 tablespoon salt
1 teaspoon black pepper
1 teaspoon thyme
1 teaspoon rosemary
1 cup beef broth
Instructions
Preheat the oven to 300°F (150°C).
In a bowl, mix honey, minced garlic, olive oil, salt, pepper, thyme, and rosemary.
Rub the mixture all over the beef shoulder.
Place the beef in a roasting pan and pour beef broth around it.
Cover the pan with foil and roast for 3-4 hours, or until the meat is tender.
Remove the foil and roast for an additional 30 minutes to caramelize the top.
Let the beef rest for 15 minutes before slicing and serving.
Notes
Recipe tested and perfected for best results. Enjoy!
- Prep Time: 15 minutesutes
- Cook Time: 4 hours
- Category: Main Course
- Method: Main Course
- Cuisine: American
⚡ Pro Tips & Common Mistakes to Avoid
After making this delicious slow-roasted garlic honey beef shoulder countless times, I’ve learned what separates good results from extraordinary ones. Here’s my comprehensive guide to perfection:
✅ Expert Tips for Success
🌡️ Heat Management
Understanding when to use high vs. low heat is crucial. We use low heat (300°F) for the bulk of cooking to break down collagen gently. The higher heat (same temperature, but uncovered) at the end creates the caramelized crust.
🧂 Season in Layers
The glaze contains salt, but the broth adds another dimension. This layered approach to seasoning ensures the beef flavor develops complexity rather than just tasting “salty.”
🔪 Slice Against the Grain
Always identify and cut perpendicular to the muscle fibers. This shortens the fibers, making each bite more tender. The grain direction may change in different parts of the shoulder.
🍯 Quality Honey Matters
Use pure, raw honey rather than honey-flavored syrup. Real honey caramelizes beautifully and contains enzymes that aid in tenderization.
❌ Common Mistakes to Avoid
| Mistake | Why It’s a Problem | Solution |
|---|---|---|
| Cooking at too high temperature | Meat dries out before collagen can convert | Stick to 300°F; patience is key |
| Skipping the rest period | Juices run out, resulting in dry meat | Always rest 15+ minutes |
| Using lean cuts | Without fat and collagen, meat becomes tough | Choose well-marbled shoulder |
| Poor foil seal | Moisture escapes, meat dries out | Create airtight seal with heavy-duty foil |
| Not drying the meat first | Glaze slides off, poor caramelization | Pat thoroughly dry before glazing |
🔧 Equipment Needed
You don’t need fancy tools for this recipe, but having the right equipment makes the process smoother:
Essential Equipment
- Heavy roasting pan or Dutch oven: Distributes heat evenly and retains moisture
- Heavy-duty aluminum foil: Creates a tight seal for braising
- Mixing bowl: For combining the glaze
- Sharp carving knife: For slicing against the grain
- Cutting board: Preferably with a groove to catch juices
- Paper towels: For patting meat dry
Helpful but Optional
- Instant-read thermometer: For checking internal temperature (195-205°F for pull-apart tender)
- Basting brush: For applying glaze evenly
- Oven thermometer: Ensures accurate oven temperature
- Fat separator: For making gravy from pan drippings
🔄 Variations & Substitutions
This versatile recipe adapts beautifully to different preferences and dietary needs:
| Variation | Modification | Notes |
|---|---|---|
| Spicy Version | Add 1 tsp cayenne or 2 tbsp hot sauce to glaze | Balances beautifully with honey’s sweetness |
| Asian-Inspired | Replace olive oil with sesame oil, add ginger | Pairs well with rice and stir-fried vegetables |
| Mediterranean Style | Add 2 tbsp za’atar and lemon zest | Perfect with Greek-style sides |
| Lower Sugar | Use ½ cup honey + ½ cup sugar-free maple syrup | Still caramelizes nicely |
| Different Cut | Use beef chuck roast or brisket | Adjust cooking time as needed |
| Citrus Twist | Add orange zest and juice to glaze | Brightens the rich beef flavor |
For another delicious way to enjoy beef, try this Special Caramelized Beef and Peanut Noodles Recipe that uses similar flavor-building techniques.
📦 Storage & Meal Prep Guide
This slow-roasted garlic honey beef shoulder is perfect for meal prep – in fact, many argue it tastes even better the next day as flavors continue to meld!
Storage Guidelines
🧊 Refrigerator
3-4 days
Store in airtight container with some of the cooking liquid to keep moist
❄️ Freezer
2-3 months
Slice or shred, store with gravy in freezer bags, remove air
🔥 Reheating
Low & slow
325°F covered for 20-30 min, or microwave with added liquid
Meal Prep Ideas
- Beef tacos: Shred the meat and serve with fresh salsa and pickled onions
- Grain bowls: Slice over rice with roasted vegetables
- Sandwiches: Pile on crusty bread with horseradish cream
- Pasta: Shred into a rich tomato sauce
- Salads: Serve warm slices over mixed greens with balsamic
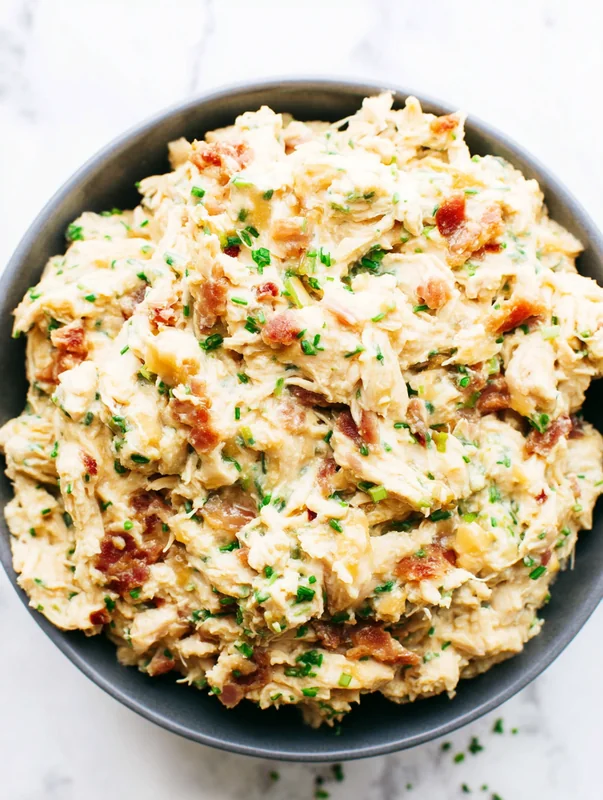
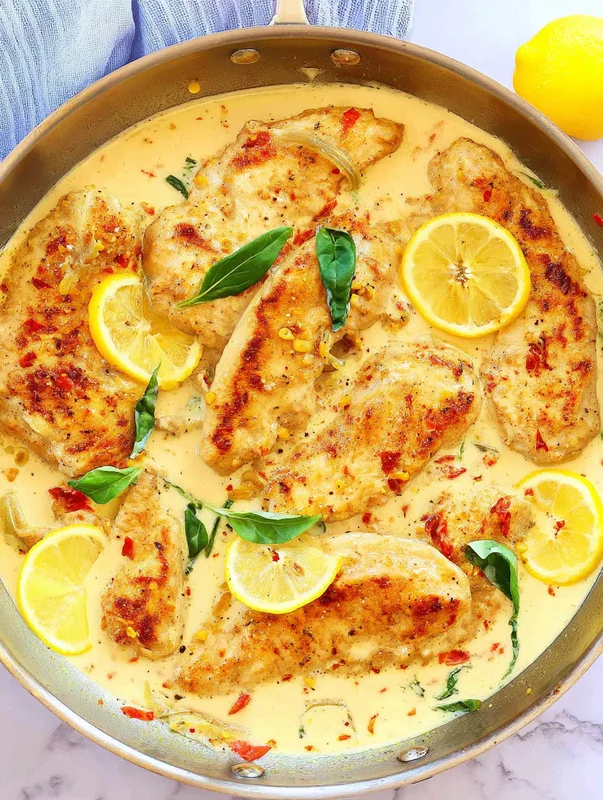
If you love meal prepping proteins, you might also enjoy this Family-Favorite Cheesy Garlic Butter Chicken Recipe that’s equally make-ahead friendly.
❓ Frequently Asked Questions
Can I make this slow-roasted garlic honey beef shoulder in a slow cooker?
Yes! Place the glazed beef in your slow cooker with the broth, cook on LOW for 8-10 hours or HIGH for 4-5 hours. To get the caramelized top, transfer to a baking sheet and broil for 3-5 minutes at the end, watching carefully to prevent burning. The slow cooker method is more hands-off but produces slightly less caramelization than the oven method.
How do I know when the beef shoulder is done cooking?
The beef is ready when it reaches an internal temperature of 195-205°F (90-96°C) and a fork slides in and out with no resistance. The meat should shred easily when pulled with two forks. If it still feels tough after 4 hours, simply re-cover and continue cooking in 30-minute increments until tender.
Can I prepare the beef shoulder the night before?
Absolutely! Apply the honey garlic glaze the night before, cover tightly, and refrigerate. This actually enhances flavor as the seasonings penetrate deeper into the meat. Remove from refrigerator 30-60 minutes before cooking to take the chill off, then proceed with the recipe. This make-ahead step is great for holiday meal planning.
What should I serve with slow-roasted garlic honey beef shoulder?
This versatile main course pairs beautifully with creamy mashed potatoes, roasted root vegetables, steamed rice, or crusty bread to soak up the delicious juices. For a lighter option, serve with a crisp green salad dressed with balsamic vinaigrette. The sweet-savory profile also works wonderfully with Greek-style sides like roasted lemon potatoes, tzatziki, and warm pita bread.
Why did my honey glaze burn instead of caramelizing?
Burning typically happens when the oven temperature is too high or the uncovered roasting phase goes too long. Ensure your oven is accurately set at 300°F – use an oven thermometer to verify. Watch the beef closely during the final 30 minutes and tent with foil if the glaze starts to darken too quickly. A deep mahogany color is perfect; black spots indicate burning.
Can I double this recipe for a larger gathering?
Yes, this recipe scales well for crowds. Use two 3-4 lb roasts rather than one massive piece – this ensures even cooking. Double all glaze ingredients and use 2 cups of broth. You may need two roasting pans or a very large Dutch oven. Cooking time remains similar (3-4 hours) as long as the beef pieces aren’t stacked on top of each other.
📚 Learn More About Cooking Science
Want to deepen your understanding of the techniques used in this recipe? These trusted resources offer excellent culinary education:
- Serious Eats – The Food Lab – Deep dives into the science behind cooking techniques
- America’s Test Kitchen – Rigorously tested recipes and equipment reviews

👩🍳 About Chef Lucía Barrenechea Vidal
Chef Lucía brings over 15 years of professional culinary experience to FrutaMeal. Trained in both Mediterranean and Latin American cuisines, she specializes in transforming humble ingredients into extraordinary meals through time-honored techniques. Her passion lies in teaching home cooks the “why” behind recipes, empowering them to cook with confidence. When not developing recipes, Lucía enjoys exploring local farmers markets and experimenting with traditional preservation methods.